Chrome Extension — Setup & Usage Guide
Install the FluxHR Hiring Helper to capture candidate profiles from LinkedIn and auto-fill job postings — all from your browser toolbar.
1Install the Extension
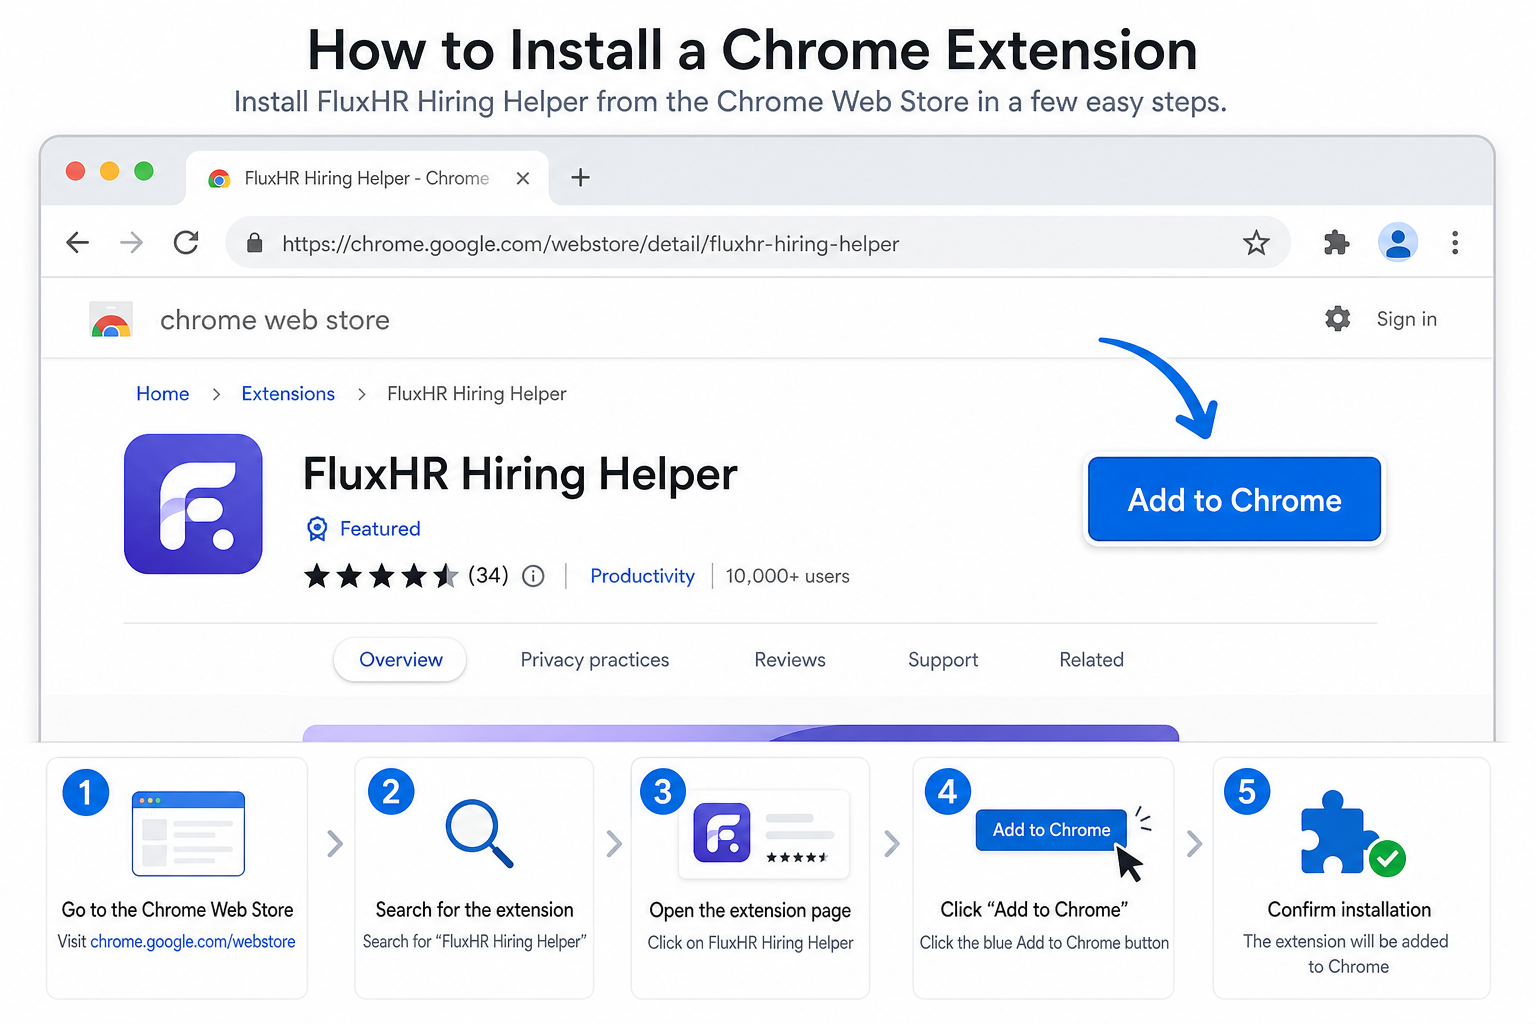
Open the Chrome Web Store and add FluxHR Hiring Helper to your browser. It takes just a few seconds.
- Click the button above, or search for "FluxHR Hiring Helper" in the Chrome Web Store.
- On the extension page, click "Add to Chrome".
- Confirm by clicking "Add extension" in the popup dialog.
2Pin It to Your Toolbar
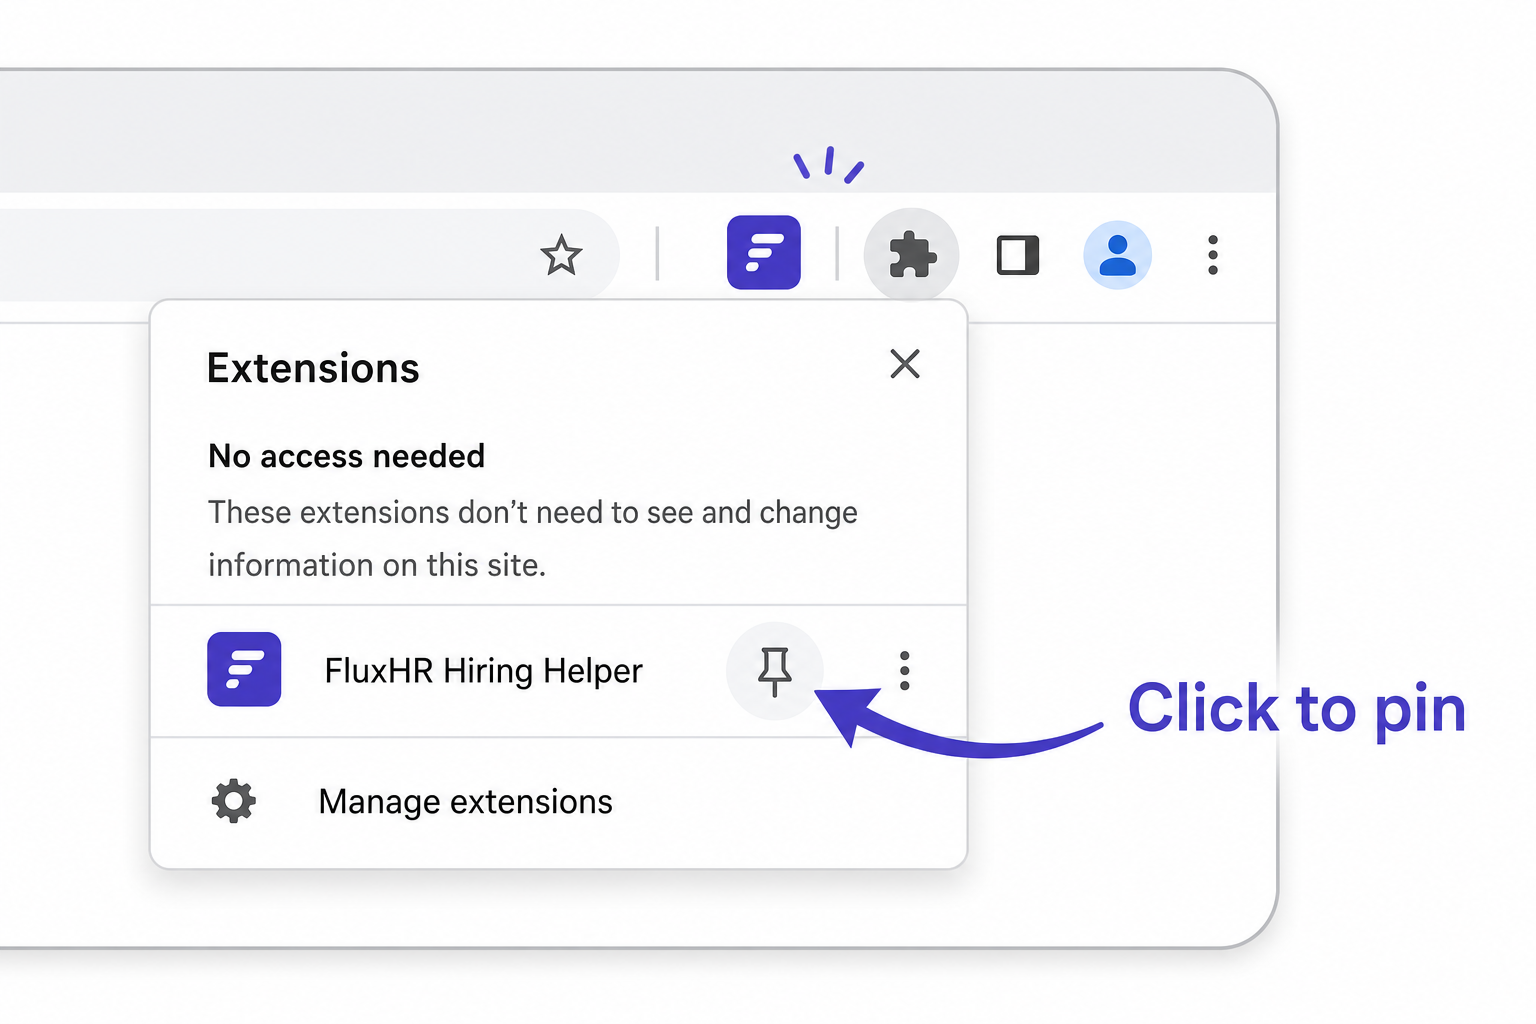
Pinning the extension keeps it one click away whenever you're browsing LinkedIn.
- Click the puzzle piece icon (Extensions) in Chrome's top-right toolbar.
- Find FluxHR Hiring Helper in the list.
- Click the pin icon next to it. The FluxHR icon will now appear in your toolbar.
3Sign In
Use the same email and password you use for app.fluxhr.com.
- Click the FluxHR icon in your toolbar.
- Accept the Terms & Privacy policy on first use.
- Enter your FluxHR credentials and click Sign In.
4Add a Candidate from LinkedIn
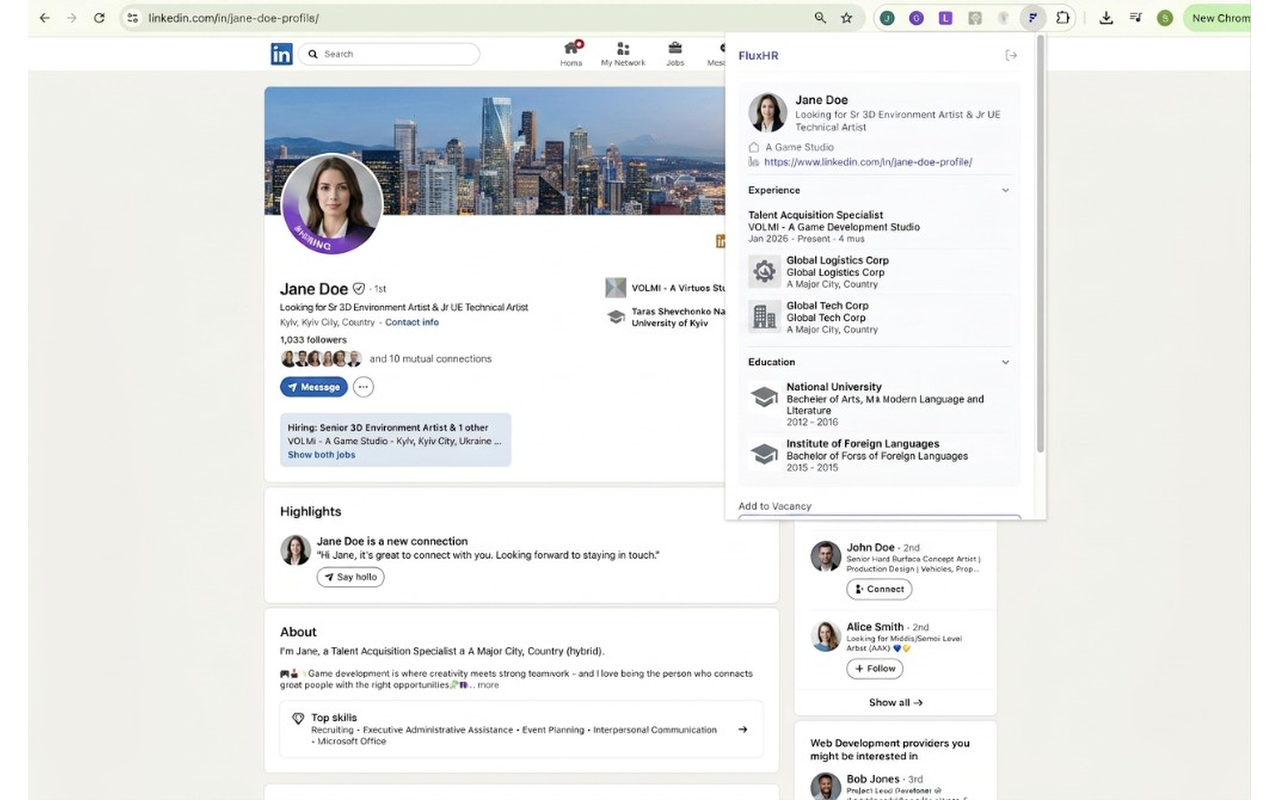
Navigate to any LinkedIn profile, then click the FluxHR icon. The extension automatically reads the candidate's name, headline, company, location, experience, education, and skills.
- Go to a LinkedIn profile page (e.g.,
linkedin.com/in/someone). - Click the FluxHR icon in your toolbar.
- Review the parsed candidate data in the popup.
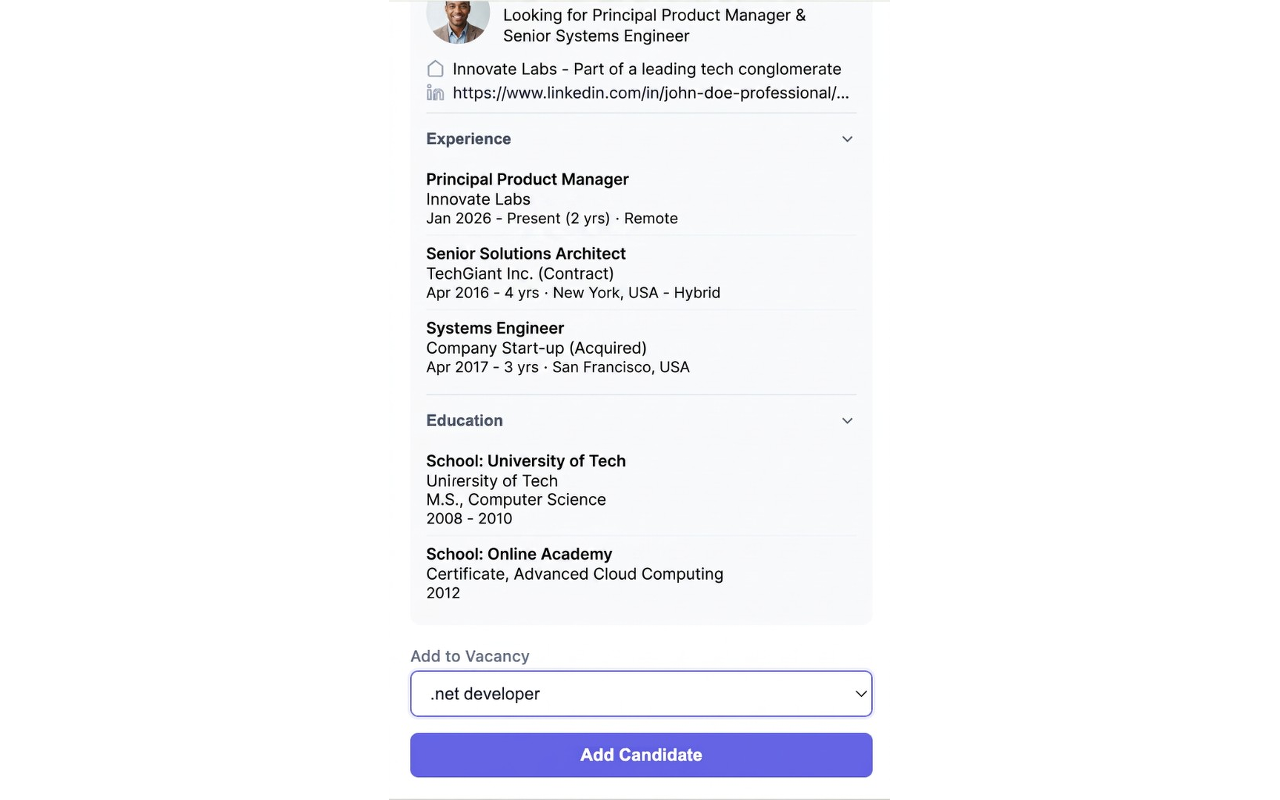
- Click "Add Candidate" to save them to your FluxHR database.
5General Database vs. Specific Vacancy
You can add candidates to your general talent pool or directly to a specific job vacancy.
- In the extension popup, find the "Add to Vacancy" dropdown.
- Choose where to add the candidate:
- General Candidate Database (default) — goes into your company-wide talent pool.
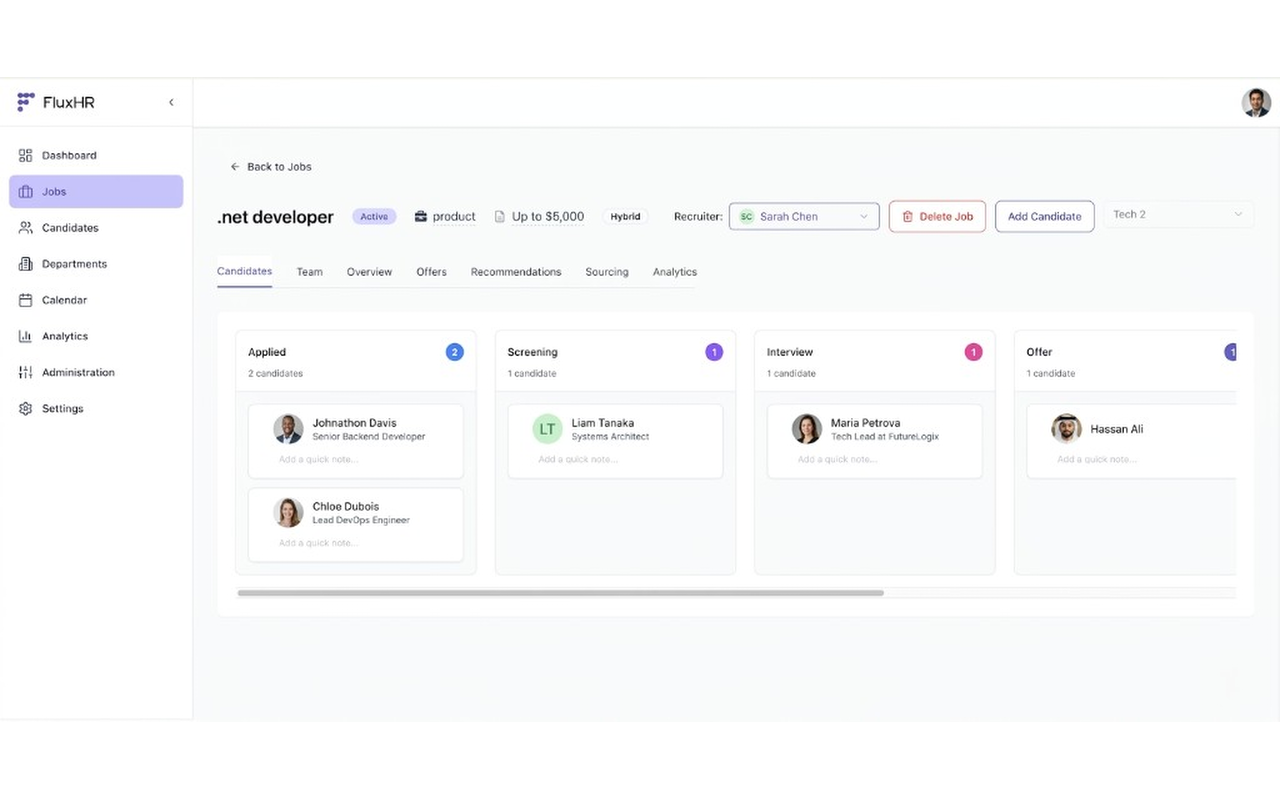
- A specific vacancy — select any published job. The candidate is added directly to that job's pipeline.
- Click "Add Candidate" to confirm.
General Database
Best for building a talent pool. Browse and assign candidates to jobs later from your ATS.
Specific Vacancy
Best when actively sourcing for an open role. The candidate lands in the job's "Applied" stage.
6Post a Job to LinkedIn
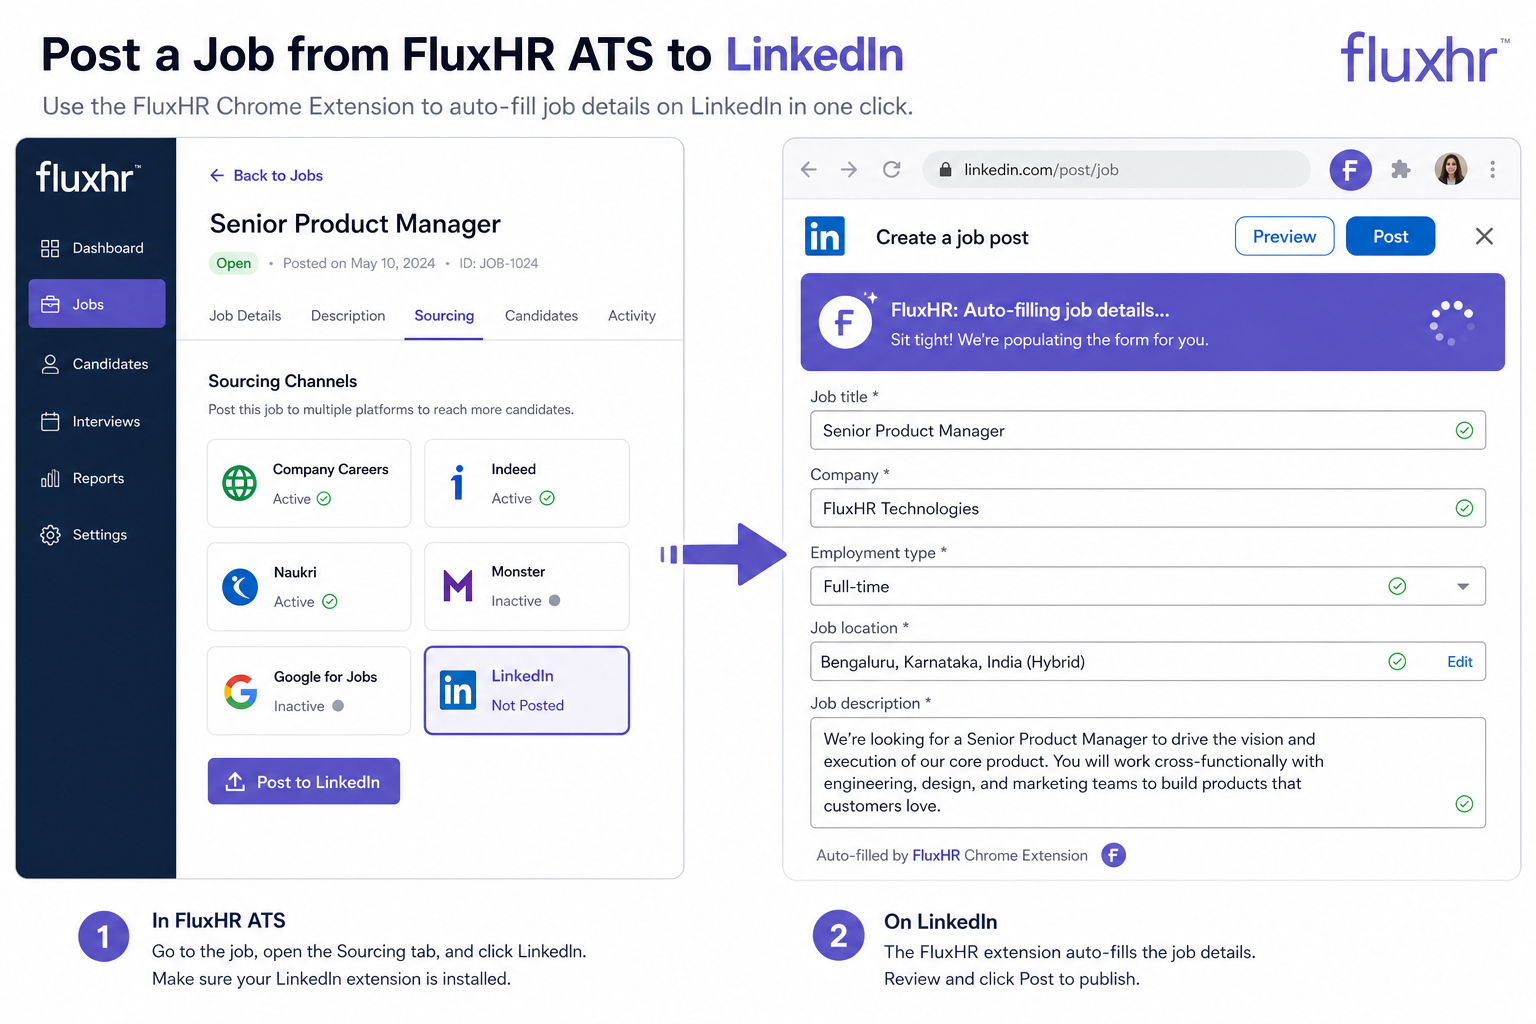
Use the extension to auto-fill LinkedIn's job posting form with details from your FluxHR ATS.
- In FluxHR ATS, open the job you want to post.
- Go to the Sourcing tab.
- Click the LinkedIn channel.
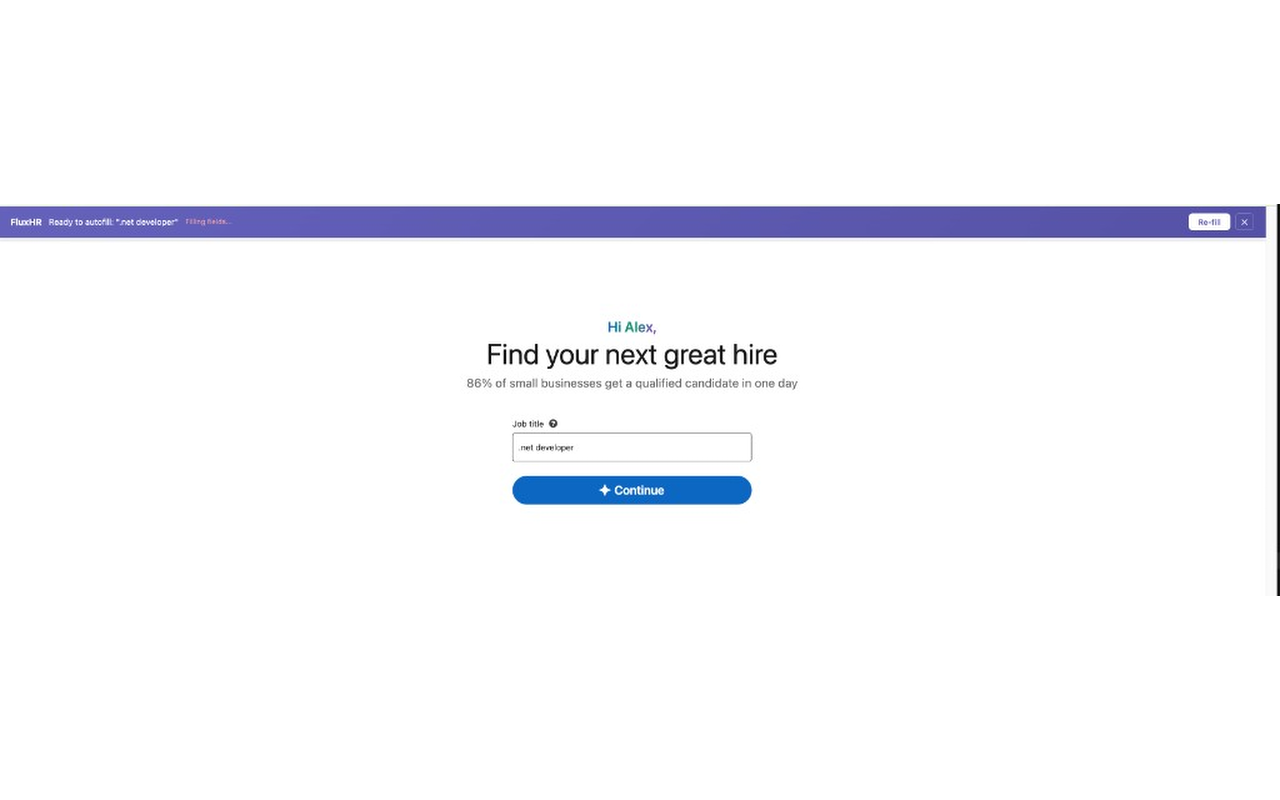
- The extension opens LinkedIn's job posting page and auto-fills the title, location, employment type, and description.
- Review the details and click Post on LinkedIn.